

Custom printed Stickers are among the most versatile products in print. They can identify products, reinforce brands, streamline operations and add creativity to packaging, signage and promotions. Whether you’re running a packaging line, preparing for a retail campaign or planning promotional giveaways, the right approach to design, material and format will help you get better results.
This guide answers the key questions about how to plan, design, order and apply Stickers effectively. It explores every major format, finish and use-case, from roll labels for packaging machinery to large-scale floor, wall and window graphics. You’ll also find practical advice on choosing materials, preparing artwork, ordering your print and using your Stickers.
Stickers Guide Contents
- What are the main Sticker formats (sheets, rolls, individual) and when should you choose each?
- What are the common materials for Stickers and how do you pick the right one for your application?
- How should you conceptualise your Sticker campaign or labelling strategy?
- What design best-practices should you follow when creating your Sticker artwork?
- How does Sticker orientation, especially on rolls, affect how they’re applied manually or by machine?
- What sizes and formats should you consider?
- How do you use Stickers in less conventional applications such as floors, walls and windows?
- What is the ordering process and what should larger businesses or resellers consider?
- What are the advantages of premium finishes and what trade-offs come with them?
- How can Stickers add value in specific use-cases?
- What are the common mistakes and how can you avoid them?
- Summary and key take-aways
1. What are the main Sticker formats (sheets, rolls, individual) and when should you choose each?
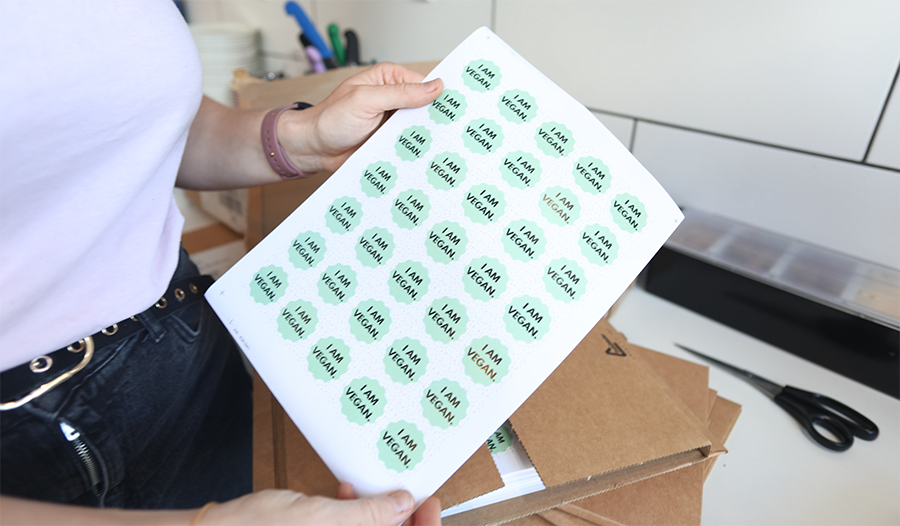
Stickers supplied on sheets
Multiple stickers are printed on a flat backing sheet such as A4. Stickers on Sheets are practical for small to medium quantities where you’ll be applying by hand or distributing designs as sets.
- Best for: relatively lower quantity runs, when manual distribution (peeling and applying by hand) is acceptable, when you want a sheet layout you can hand out or post.
- Pros: quick turnaround, lower setup cost, easy to handle manually. Can be stored flat to keep them neat while taking up minimal space.
- Cons: for high-volume or machine application, sheet formats may be less efficient than roll formats.
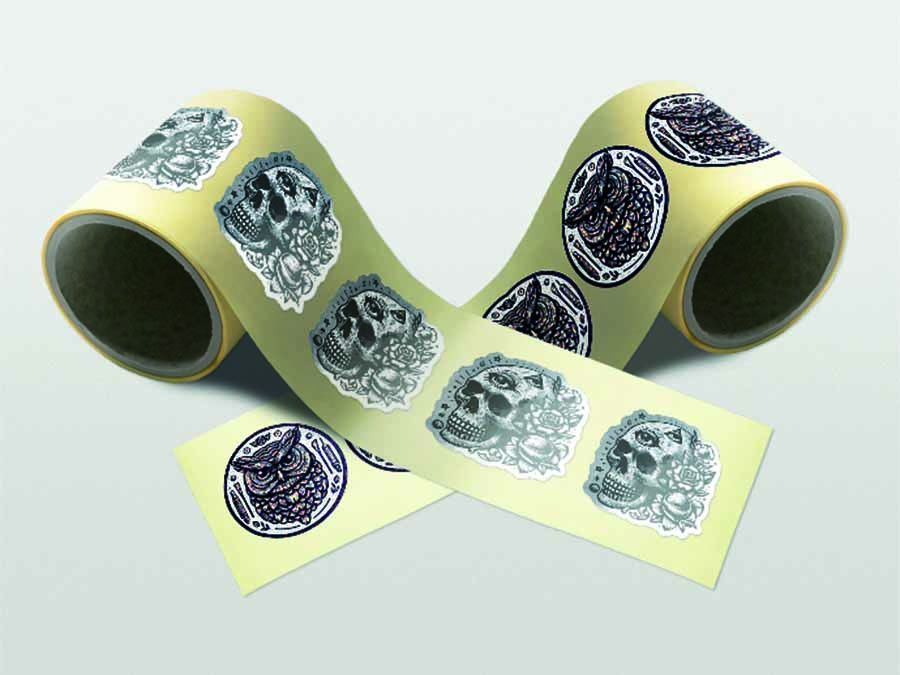
Stickers on rolls
Stickers on Rolls are wound onto a recyclable cardboard roll. While they are a must for most automated applicators, they can also be easier to handle for manual application and convenient to store.
- Best for: high-volume labelling, machine application (automatic or semi-automatic), integration into packaging lines, or bulk giveaways where dispensing from a roll is more efficient.
- Pros: efficient for large quantities, compatible with labelling machines or fast manual work, practical for packaging and operational use.
- Cons: may have longer lead times than sheet formats and are less flexible if you only need a handful of Stickers.
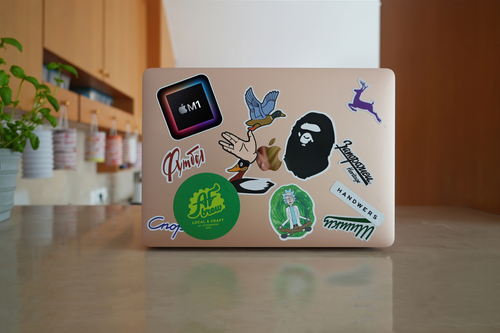
Individual Stickers
Individual Stickers are supplied as single cut pieces with their own backing, ideal for merchandise and giveaways.
- Best for: promotional items, direct hand-outs, retail giveaways, merchandise where the Sticker itself is the item (rather than used for labelling).
- Pros: premium feel, ideal for high value or brand merchandise, each piece stands alone. Ideal to sell as a piece of merchandise, to include in packaging, or as a piece of ‘case candy.’ Perfectly portable for visitors to take away from your location or event stand.
- Cons: trickier to unpeel, so less efficient for bulk labelling.
Should I choose Stickers on sheets, on rolls, or supplied individually?
- If you’re labelling high-volume products or packaging, a roll is often the most practical choice. For machine labelling, it’s the only choice, but be sure to order the correct orientation (see below).
- If you’re distributing Stickers as a promotional freebie or merch, individual pieces make sense.
- If you require a small quantity, Stickers on sheets are often the most cost effective option. Perfect for providing end-users with a small set of unique Stickers, eg. a magazine insert.
2. What are the common materials for Stickers and how do you pick the right one for your application?
Material selection is critical. Choosing the wrong material or adhesive can lead to peeling, poor adhesion or surface damage. The right specification ensures your Stickers perform reliably in their intended environment and maintain a professional appearance.
Key material and adhesive variables
-
Base material: paper, polypropylene (PP), vinyl and other films
-
Adhesive type: permanent, removable or repositionable
-
Finish: gloss, matt, clear or transparent
-
Usage context: indoor, outdoor, curved surfaces, cold storage or wet environments
-
Special materials: eco-friendly, vegan-certified or metallic/foil finishes
Examples of common Sticker materials
-
White gloss paper: available with permanent or removable adhesive; suited to general labelling on cardboard or plastic packaging. Uncoated, writable surface.
-
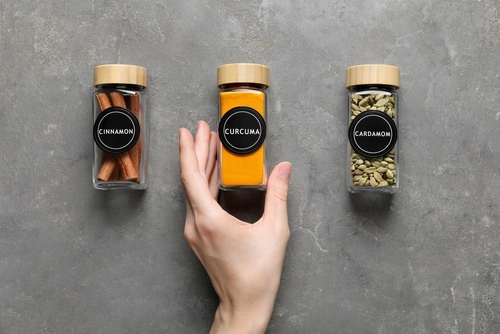
Clear gloss polypropylene (PP): a durable transparent film ideal for jars, bottles and windows.
-
White gloss polypropylene (opaque): flexible and weather-resistant, suitable for curved or outdoor surfaces.
-
Uncoated white paper: freezer-friendly and cost-effective for logistics or product labels.
-
Eco and vegan Sticker materials: made with water-based adhesives and PVC-free substrates, certified animal-cruelty-free.
Application examples and material requirements
-
Chilled or frozen packaging: choose materials with low temperature tolerance, such as freezer-safe uncoated paper.
-
Outdoor signage and window Stickers: select durable film materials with UV-resistant inks and adhesives that withstand temperature changes, moisture and wear. See the Printed Packaging Labels guide for more on weather resistance.
-
Promotional giveaways and merchandise: visual impact matters most. Metallic, foil, custom shape or transparent materials can add perceived value — as seen in our blog post about Shiny Stickers.
-
Operational labelling and logistics: opt for materials compatible with dispensers, featuring the correct roll format and liner type for reliable machine feeding. Opaque, high contrast labels are better for QR and Barcode printing, while uncoated stocks are more suited for labels when colleagues need to add a tick to a box, a signature or a date for logistical purposes.
Understanding Sticker adhesives: strength, tack and permanence
The adhesive layer defines how a Sticker performs in use. Selecting the correct formulation is essential, particularly when dealing with different surfaces, temperatures and application methods.
Key adhesive terms
-
Tack: the initial grip when a Sticker first meets the surface. High-tack adhesives bond instantly, while low-tack versions allow repositioning.
-
Peel strength: how firmly a Sticker remains attached once applied. High peel strength is vital for outdoor or curved applications.
-
Shear strength: resistance to sliding or lifting over time, important on vertical or angled surfaces.
Permanent adhesives
Designed to create a lasting bond with most clean, dry surfaces. Used on packaging, logistics labels, window graphics and other applications where removal isn’t required.
-
Ideal for: long-term labelling, exterior use, packaging and shipping.
-
Considerations: test adhesion on the actual surface; permanent adhesives can strengthen over time, particularly on porous materials such as cardboard or uncoated paper.
Removable and repositionable adhesives
Formulated with a gentler tack, these adhesives are suitable for temporary promotions or where residue must be avoided.
-
Ideal for: retail and price labels, temporary signage, cover-mounted promotions and product samples.
-
Considerations: heat and time can increase adhesion; even removable adhesives may become permanent if left in place for long periods.
Special-purpose adhesives
-
Freezer-grade: maintain grip down to -20°C or below, ensuring adhesion in chilled storage.
-
Outdoor-grade: water and UV-resistant acrylic emulsions remain stable across temperature extremes.
-
Eco water-based: low-VOC and solvent-free, found in Vegan Stickers for brands prioritising sustainability.
The balance of tack and permanence defines usability. Too strong and the Sticker tears or leaves residue; too weak and it peels prematurely. Testing before full production prevents costly rework.
Stickers for food packaging
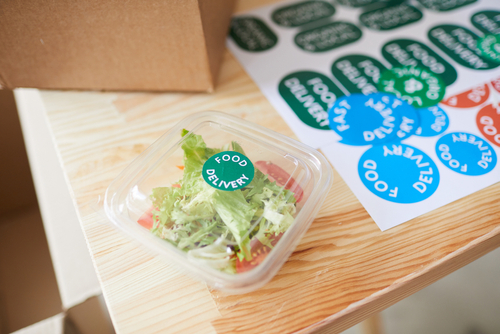
Food packaging requires materials that are safe, compliant and practical under demanding conditions. Labels may be exposed to refrigeration, moisture and handling, and in some cases must be suitable for direct food contact.
What to consider
-
Food-contact approval: materials must comply with regulations for direct or indirect contact with dry or moist non-fatty foods.
-
Temperature resistance: packaging may move between chilled storage and ambient shelves; adhesives must tolerate the full range.
-
Surface type: cardboard sleeves, plastic tubs and glass jars all require different flex and adhesion.
-
Removability: labels on reusable containers or cook-at-home packaging should peel away cleanly.
-
Condensation and humidity: adhesives for chilled and frozen packaging must resist moisture and condensation.
Common materials used in food and food-retail packaging
| Material | Usage | Adhesive | Food Safety & Temperature Range |
|---|---|---|---|
| White Gloss Paper – Permanent | Multi-purpose label that performs well on cardboard and plastic bags. Common for chilled foods. | Permanent aqueous acrylic emulsion | Approved for direct contact with dry or moist non-fatty foods. Temperature -10°C to +65°C. Apply above 0°C. |
| White Gloss Paper – Removable | Deep-freeze friendly and easy to remove. | Removable aqueous acrylic emulsion | Approved for direct contact with dry or moist non-fatty foods. Temperature -5°C to +60°C. Apply above 15°C. |
| Clear Gloss Polypropylene – Permanent | Transparent film for bottles, jars and windows. | Permanent aqueous acrylic emulsion | Suitable for direct food contact. Meets EN71/3 European Toy Regulation. Temperature -15°C to +80°C. Apply between -5°C and +40°C. |
| White Gloss Polypropylene – Permanent | Opaque white film for curved or outdoor surfaces. Ideal for jars and bottles. | Permanent aqueous acrylic emulsion | Suitable for direct food contact. Meets EN71/3. Temperature -15°C to +80°C. Apply between -5°C and +40°C. |
| White Uncoated Paper – Permanent | Freezer-friendly label with a natural, tactile finish. Performs well on cardboard and plastic. | Permanent aqueous acrylic emulsion | Approved for direct contact with dry or moist non-fatty foods. Temperature -20°C to +100°C. Apply above 5°C. |
| White Uncoated Paper – Removable | Non-permanent label for ready meals or frozen produce. | Removable aqueous acrylic emulsion | Approved for direct contact with dry or moist non-fatty foods. Temperature -40°C to +50°C. Apply above -20°C. |
| Neon Coated Paper | Fluorescent paper for high-visibility promotions. | Permanent | Indoor use only. Not suitable for direct food contact, but effective on secondary packaging or point-of-sale displays. |
| Vegan Stickers | Eco-friendly, PVC-free paper with UV resistance. | Water-based semi-permanent adhesive | V Label certified as cruelty-free. Suitable for indoor and outdoor use. |
Practical advice for food producers and packers
-
Confirm compliance with food-contact and migration regulations.
-
Plan application temperature carefully; applying too cold can weaken adhesion.
-
Ensure resistance to oils, moisture and handling.
-
Select finish for readability: gloss stocks resist smudging; uncoated paper allows handwriting for dates or batch codes.
-
Prioritise clean removal for packaging that will be reused by the consumer.
From frozen ready meals to bakery boxes and beverage bottles, the right pairing of face stock and adhesive ensures food packaging remains safe, compliant and brand-consistent.
Checklist for material selection
-
Where will the Sticker be applied (surface type: glass, plastic, metal, fabric, wall, floor)?
-
What environment will it face (indoor/outdoor, temperature, humidity, exposure to chemicals or foot traffic)?
-
How long must it stay adhered (temporary campaign or permanent branding)?
-
Should it be removable or repositionable?
-
What visual or finish attributes are required (clear background, metallic effect, custom shape)?
-
What quantity and format are planned (sheet, roll or individual) and how does that affect material choice?
-
Does your brand require eco credentials such as vegan or PVC-free certification?
Choosing the right material and adhesive combination from the outset ensures Stickers that stay put, perform correctly and meet both visual and regulatory standards.
3. How should you conceptualise your Sticker campaign or labelling strategy?
Before committing to design or production, it pays to approach Stickers as part of a broader strategy. In practice, that means defining purpose, function and measurement before aesthetics. A well-planned brief avoids the familiar pitfalls of the wrong material, incompatible roll orientation or inconsistent branding across sites.
Start with purpose
Every Sticker should earn its place. Ask what job it’s doing:
-
Branding and packaging: carrying essential information while projecting quality.
-
Promotional activity: catching attention at events or through giveaways.
-
Operational use: improving stock control, logistics or safety compliance.
-
Environmental signage: conveying direction, pricing or safety messages.
Establishing function at the outset prevents creative decisions that conflict with technical needs — for instance, designing an intricate die-cut shape only to discover it slows automated labelling.
Pick the right format for the environment
Surface and setting determine specification. Indoor Stickers for smooth packaging differ completely from outdoor graphics for rough concrete or glass. Consider:
-
Surface type: cardboard, plastic, glass, metal or fabric all demand different adhesion profiles.
-
Conditions: humidity, temperature, light exposure and cleaning routines.
-
Lifespan: whether the Sticker must endure months of use or a single event.
Align format with workflow
Think through how Stickers will be handled and applied:
-
Manual application favours sheets or individual pieces.
-
Automated or semi-automatic systems require rolls with defined core size, web width and unwind direction.
-
Distribution plans may affect presentation — rolled Stickers are easy to dispatch in bulk, whereas sheets or individuals suit marketing kits.
Be clear on your requirements and realities
Set parameters early to help designers and production teams deliver efficiently:
-
Brand identity: colour palette, shape conventions and material finishes already established.
-
Budget and volume: print method and turnaround options depend on quantity.
-
Lead time: account for proofing, sampling and delivery to multiple destinations.
-
Regulatory or safety considerations: especially for food packaging, outdoor signage or slip-rated floor graphics.
Establish metrics for success
A Sticker campaign can succeed in many ways, and the definition of success often depends on scale and purpose.
For sole traders and SMEs, effectiveness can be felt as much as measured. A Sticker may justify its cost through the goodwill, leads or feedback it generates, or simply by raising visibility, creating a sense of inclusion, or putting smiles on the faces of customers. These intangible outcomes often carry as much weight as financial return, particularly for community-focused or creative ventures.
For larger enterprises and resellers, a Sticker project may form part of a broader campaign or packaging strategy. In those cases, it must be measured more precisely to establish its viability against alternative investments. Metrics might include application efficiency, production costs, engagement levels, or the measurable impact on brand consistency across multiple sites.
Defining what “success” means before production begins allows each business, large or small, to assess the results on its own terms.
-
Operational metrics: units applied per hour, waste reduction, label accuracy.
-
Marketing metrics: redemption rates, social engagement or reach.
-
Sustainability metrics: percentage of recyclable or vegan stock used.
Document these objectives before briefing your designer or printer. Clear success measures allow teams to assess not just how a Sticker looks, but how well it performs its job.
Strategic outcome
When every element, material, adhesive, size, shape and finish, is chosen in service of the defined goal, Stickers become reliable working assets rather than afterthoughts. Planning at this stage ensures creative alignment with production reality, minimising risk and maximising return on your print investment.
4. What design best practices should you follow when creating your Sticker artwork?
Once your strategy is clear, design becomes the bridge between concept and production. Good Sticker design balances creativity with technical precision — making sure what you see on screen translates perfectly to print.
Whether you’re a sole trader designing your first product label or a national brand managing hundreds of SKUs, the same principles apply: simplicity, clarity and accuracy at every stage.
Start with the right template
Always begin with the correct artwork template for your format — Stickers on sheets, rolls or supplied individually. Templates set the precise trim, bleed and safe zones for each size, and are available in Photoshop, Illustrator and PDF formats via the Supplying Artwork guide. Working to scale from the outset avoids resizing later and ensures your cut lines line up perfectly with the intended format.
Keep the design simple and purposeful
A Sticker’s role and environment should dictate its content and visual style. Clarity always outperforms complexity, especially at smaller sizes or on curved surfaces.
-
Prioritise one clear focal point — usually a logo, product name or core message.
-
Avoid overcrowding the layout with text or imagery that won’t reproduce clearly.
-
Maintain high contrast between background and text for maximum legibility.
-
Consider how a design will appear when viewed quickly or from a distance, particularly for packaging or event giveaways.
Respect margins and bleed
For any printed Sticker, the edge is critical.
-
Keep important text and logos at least 3 mm inside the trim line.
-
Extend background colour or imagery 3 mm beyond the edge to create bleed, preventing unwanted white borders.
-
Avoid fine borders; even minor trimming tolerance can make them look uneven.
Use colour and finish intelligently
Colour choice should serve the message and the medium.
-
Bright colours create energy and visibility for promotions.
-
Subtler tones convey sophistication for premium packaging.
-
Metallic or foil finishes add shine but can reduce legibility for fine detail; bolder typefaces work best. See The allure of Shiny Stickers for visual examples.
-
Ensure sufficient contrast for transparent or reflective materials — consider adding a white ink layer where needed.
Think about shape and peelability
Custom shapes help reinforce identity — a cloud for a children’s brand, a bottle silhouette for a brewery — but the design must still peel cleanly.
-
Avoid extremely fine or inward curves that make removal difficult.
-
Include bleed and a clear cut line if ordering custom outlines.
-
Be aware that intricate contours may slightly increase cost or production time.
Match the design to the material and surface
The same artwork can look very different across materials.
-
For transparent Stickers, add a white ink layer beneath artwork areas that need opacity.
-
For metallic materials, use higher contrast and heavier weights for text.
-
For curved surfaces, mock up the layout to check how logos and type sit once applied.
-
For wall or floor graphics, maintain strong contrast and large type for visibility in varied lighting.
Preflight checks
Technical precision underpins every great print job. Solopress runs a final preflight check before sending artwork to print, but you can prevent delays caused by unnecessary rounds of amends and approvals by taking a moment to check these essentials before submitting your artwork.
-
Verify resolution is at least 300 dpi at full size.
-
Confirm colour mode is CMYK, not RGB.
-
Ensure fonts are outlined or embedded.
-
Check that cut and white ink layers are labelled correctly.
-
Double-check size, orientation and file naming.
This process prevents delays and ensures your artwork prints as expected the first time.
Test and review where possible
When working with a new material, finish or application, order a short run or proof first. Testing how a Sticker looks and behaves in its real environment often exposes faults or features that require adjustment.
Design for real-world use
A good Sticker design doesn’t just look right; it works right. It should:
-
Be legible in the context where it appears.
-
Apply easily and stay put for its intended lifespan.
-
Reflect your brand identity consistently with other printed materials.
From simple address labels to large-format wall graphics, attention to these fundamentals ensures your design performs in print just as well as it does on screen.
5. How does Sticker orientation, especially on rolls, affect how they’re applied manually or by machine?
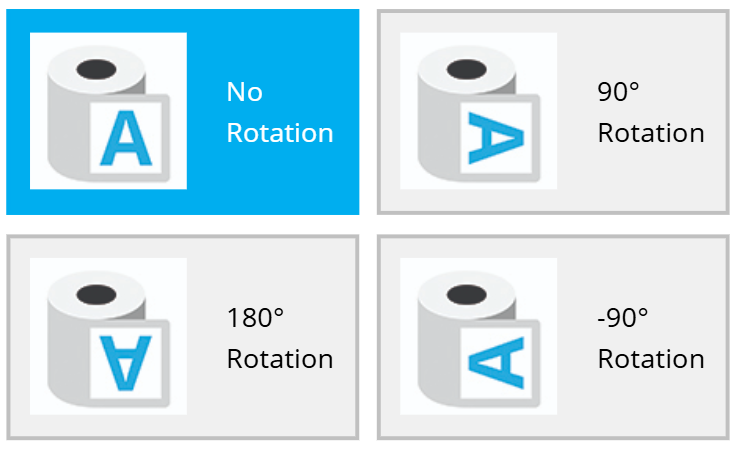
Orientation and position determine how Stickers feed, peel and apply during use. While sheet orientation matters for layout efficiency, roll orientation is where precision truly counts — particularly in automated packaging and labelling systems.
Orientation for Stickers on rolls
When Stickers are supplied on rolls, orientation determines how they unwind and present to either a person or a machine. Get it right, and the workflow runs smoothly. Get it wrong, and production slows or stops entirely.
Roll width and label size
The width of the roll must accommodate the Sticker’s dimensions plus the necessary backing margin. If the Sticker is too large for the roll width, it can waste material or exceed the dispenser’s capacity. Always confirm the maximum web width your applicator accepts.
Core diameter and winding direction
Rolls are wound around a cardboard core, typically 25 mm, 38 mm or 76 mm in diameter. Both core size and winding direction determine compatibility with dispensers and labelling machines.
-
Wound inside vs wound outside: some applicators expect the printed side facing in, others facing out.
-
Unwind direction: whether the leading edge presents top, bottom, left or right first. This matters when artwork has a clear orientation, such as a logo or barcode.
For manual use, consistent unwinding also helps prevent snags and waste.
Print side and release liner
Machines must know which side of the liner carries the adhesive and which direction it peels. The relationship between the printed face and liner determines how the label presents for application. If reversed, labels can feed incorrectly or jam the mechanism.
Spacing between Stickers
Consistent gaps between Stickers (known as the web or pitch) are essential for applicator accuracy. Too little spacing and the machine’s sensor can misread positions; too much and material is wasted.
Orientation relative to unwinding
For machine labelling, orientation (portrait vs landscape) affects how easily a label is picked up and placed. Applicators are calibrated for one orientation, so the roll must unwind in the correct direction for artwork to appear upright on the product.
Integration with labelling lines
If Stickers are part of a packaging line, confirm all roll specifications before ordering:
-
Core diameter
-
Roll width (web width)
-
Winding direction
-
Sticker spacing (pitch)
-
Outer roll diameter limit
Providing these details to your printer ensures your rolls arrive ready for immediate use.
Manual application from rolls
Even when applied by hand, orientation still affects speed and comfort. Rolls that unwind in the user’s natural direction, with clean kiss-cut edges and no snags, make repetitive labelling faster and reduce fatigue. Consistent spacing also helps operators maintain rhythm and accuracy.
Orientation for Stickers on sheets
With sheet formats, orientation affects material efficiency more than usability. Sheets are usually printed to maximise yield rather than favour any particular direction.
-
Portrait or landscape: orientation typically follows the most economical layout on the press.
-
Top-to-bottom vs side-to-side: both work equally well for manual application; there’s no major ergonomic advantage.
-
Borders and registration: as with any flat-printed item, alignment consistency depends on accurate trimming rather than orientation.
For most users, the decision is practical rather than strategic — choose the size and shape that best fits your design and makes the most efficient use of material.
Risks of incorrect orientation or specification
Incorrect roll orientation or incompatible core size can lead to production delays, wasted material and mis-applied labels. In high-volume packaging environments, that can mean:
-
Machine stoppages and downtime
-
Increased waste from misfeeds
-
Slower labelling line speeds
-
Potential reprinting and reordering costs
By confirming your dispenser or applicator specifications before ordering, you ensure seamless integration and protect operational efficiency.
6. What sizes and formats should you consider when choosing your Stickers?
Sticker size and shape influence everything from visual impact to ease of application. The right format depends on how and where the Sticker will be used — whether it’s labelling packaging, promoting a brand, or marking out floors and walls.
Conventional shapes
Most Stickers fall into familiar categories such as circles, squares and rectangles. These standard shapes are efficient to print, easy to handle and compatible with most label applicators. A broad range of sizes and materials is available across rolls, sheets and individual Stickers, so it’s straightforward to match them to your packaging or campaign needs.
Custom shapes
Custom Shape Stickers are laser-cut to your specified outline, allowing unique contours that mirror your logo or brand identity. The Custom Shape Stickers on Sheets option uses precision laser technology to create almost any form — circles within circles, diagonal edges, silhouettes or icons. While they take slightly longer to produce, they add distinctiveness and are ideal for giveaways or premium branding.
Size considerations
Sticker dimensions vary according to the surface and purpose.
-
Packaging labels: size is often limited by the space on jars, bottles, pouches or boxes. Choose a label that fits without overhanging edges or distorting on curved surfaces.
-
Giveaways and promotional Stickers: custom outlines or logo-shaped cuts help reinforce identity and add perceived value.
-
Windows and walls: larger graphics improve visibility at a distance — a window Sticker at eye level should be legible several metres away.
-
Floors: floor graphics must be large enough to attract attention safely without causing distraction; rectangular layouts around 500 × 1000 mm work well.
-
Machine or line labelling: the label height, width and roll width must match applicator specifications to ensure consistent speed and minimal waste.
Shape efficiency and production impact
Shape also affects production efficiency.
-
Rectangular labels make best use of the liner material and reduce waste, which is important in high-volume runs.
-
Irregular shapes introduce more waste between cuts and may slightly increase cost or lead time.
-
Intricate contours can also make manual peeling slower, so simpler edges are preferable for high-volume hand application.
Avoiding size and shape mismatches
Oversized or ill-shaped Stickers risk overlapping edges, uneven application or wasted material. If text is too small, key information may become unreadable once printed. Overly large designs can look awkward or cover packaging details that customers need to see.
When in doubt, print a test at 100% scale on plain paper to gauge proportion and placement before ordering. That small check can save time, money and materials later.
7. How do you use Stickers in less conventional applications – floor, wall and window – and what must you consider?

Not all Stickers are small or disposable. In many business and retail settings, large-format Stickers perform as semi-permanent signage, directional graphics or branded décor. Each surface type brings its own practical and safety requirements.
Window Stickers
Window Stickers can be either adhesive or static-cling, depending on whether the surface needs to remain residue-free.
Key considerations
-
Surface type: glass, acrylic or plastic panels.
-
Placement: inside-glass (protected from weather) or external facing (UV- and water-resistant film required).
-
Readability: confirm whether the design is viewed from the front or through the reverse of the glass.
-
Environmental factors: exposure to sunlight, temperature shifts and cleaning products.
Materials and visuals
Transparent or opaque vinyl films with good UV resistance perform best. High-contrast artwork and bold typefaces improve legibility through reflections or tinted glass.
Wall Stickers
Wall Stickers are designed to adhere securely to painted, plastered or lightly textured surfaces without causing damage when removed. Repositionable versions are popular for temporary retail displays and rental interiors.
Key considerations
-
Surface preparation: walls must be clean, dry and free from dust.
-
Adhesive strength: gentle enough to remove cleanly, strong enough to stay in place.
-
Material choice: flexible vinyl or polyester films adapt to slight textures.
-
Conditions: humidity and sunlight affect long-term adhesion and colour stability.
Scale and layout
Large wall graphics often serve branding or wayfinding purposes. For broad coverage, plan panel joins and allow installer access around corners or fixtures.
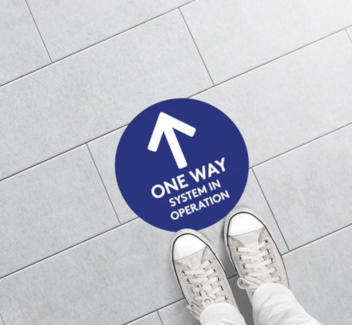
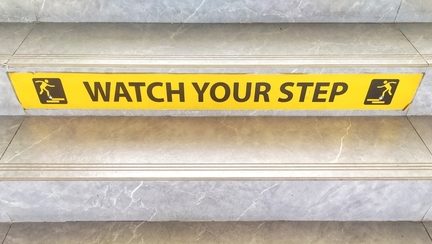
Floor Stickers
The floor is a demanding surface, subject to abrasion, cleaning agents and safety standards. Vinyl Floor Stickers are engineered with anti-slip and non-scuff coatings and can withstand outdoor exposure for several months.
Key considerations
-
Safety ratings: check slip resistance (R10, R11, R12 etc.) for compliance in public areas.
-
Material and thickness: robust, textured vinyl suited to tiles, sealed concrete or smooth laminate. Carpets are generally unsuitable.
-
Cleaning and durability: verify compatibility with detergents and floor polish.
-
Removal: adhesive must release cleanly without damaging the surface.
-
Installation: apply correctly aligned, bubble-free and fully adhered to avoid trip hazards.
Size and visibility
Floor graphics are typically large – for example 500 × 500 mm or 1000 × 1000 mm – so messages can be read from a standing distance. Use bold imagery, arrows or footprints for direction or zoning.
Risks of poor specification
Using unsuitable materials can shorten product life, create slip hazards or leave residue. For multi-site businesses, incorrect floor materials can result in inconsistent branding or, worse, safety claims.
Summary of unconventional uses
Window, wall and floor applications demand more than a standard Sticker. They function closer to signage or environmental graphics, requiring attention to surface, environment, durability, installation and removal.
In sectors such as retail, hospitality and food service, these large-format Stickers support branding, promotions, navigation and interior presentation. When produced with the correct materials, they strengthen brand integrity; when specified poorly, they risk undermining it.
8. What is the ordering process and key operational considerations for a large business or reseller buying custom Stickers?

A clear ordering process helps every customer — from small businesses to national resellers — stay on schedule, control costs and maintain brand consistency.
Step-by-step ordering process
1. Choose your Sticker format
Decide between Sheets, Rolls or Individual Stickers based on how they’ll be applied. Rolls suit machine application, sheets are ideal for smaller runs, and individuals work best for giveaways.
2. Select material and finish
Choose from paper, polypropylene (PP), vinyl or transparent film, with the right adhesive for the environment. Options such as gloss, matt or eco-friendly stocks define both look and performance.
3. Download the correct artwork template
Use the printer’s artwork templates to match the format and size precisely. Templates for Photoshop, Illustrator and PDF are available from the Supplying Artwork guide.
4. Upload, proof and approve
Once artwork is uploaded, request a digital proof to confirm layout, colour and cut lines before production begins.
5. Specify quantity, turnaround and delivery
For larger runs, confirm turnaround early — rolls may require around three working days or more, while sheets and individuals can often be produced faster.
6. Production and delivery
After approval, orders progress to printing, finishing and packing. Confirm whether multi-drop or white-label delivery is required for distribution to different sites.
7. Quality check on arrival
Inspect a sample immediately on delivery. Check for print accuracy, adhesion and consistency across batches.
Operational considerations for large businesses and resellers
Lead time and delivery guarantees
Not every format can be produced at the same speed. Sheet and individual Stickers may qualify for next-day delivery, whereas roll production typically takes longer. Factor these differences into campaign timelines.
Artwork control and brand consistency
For franchises or resellers handling multiple brands, centralised artwork control prevents inconsistency. Locking templates and using a shared approval process ensures every site receives uniform materials.
Quality and compliance
If Stickers appear on product packaging, ensure materials and adhesives meet relevant standards — such as food-contact safety or EN71/3 compliance for toys. The same diligence applies to slip-rated floor graphics or outdoor signage.
Stock management and reordering
For recurring orders, standardise on consistent sizes or roll specifications. This optimises cost and simplifies reordering. Maintain a buffer stock for campaign peaks to avoid production bottlenecks.
Application method
Machine-applied Stickers require precise specifications:
-
Roll width and core diameter
-
Unwind direction
-
Gap between labels
-
Die-cut layout and liner strength
For manual application across multiple sites, consider how easy Stickers are to peel and position. Training or short guides can reduce waste and misapplication.
Budget and unit cost
Larger runs reduce cost per unit, while extended lead times often allow for lower pricing. Always balance urgency with volume to find the most efficient production plan.
Sustainability and brand values
If your business emphasises sustainability, specify PVC-free or vegan adhesive options such as Vegan Stickers. Clearly communicating these choices reinforces brand values to customers.
Logistics and fulfilment
Campaign orders may require delivery to multiple branches or event locations. Confirm whether your supplier can support multi-drop shipments or white-label packaging to save internal handling time.
Installation and handling
Large graphics — particularly Floor Stickers or Wall Stickers — often need trained installers. Budget for labour, allow adequate installation time and confirm whether your supplier provides fitting advice or guides.
Risk management
Inaccurate specifications can cause costly downtime. For example, incorrect roll orientation may stop an automated line, or unsuitable floor materials could create a slip hazard. Test materials and adhesive performance before full deployment across multiple sites.
9. What are the advantages of premium finishes (metallic, foil, custom shape) and what trade-offs do you need to manage?
Premium finishes transform Stickers from everyday labels into tactile, memorable brand assets. They can communicate quality, attract attention and encourage customers to keep or share the item — but they also come with higher costs and some production limits.
The advantages of premium finishes
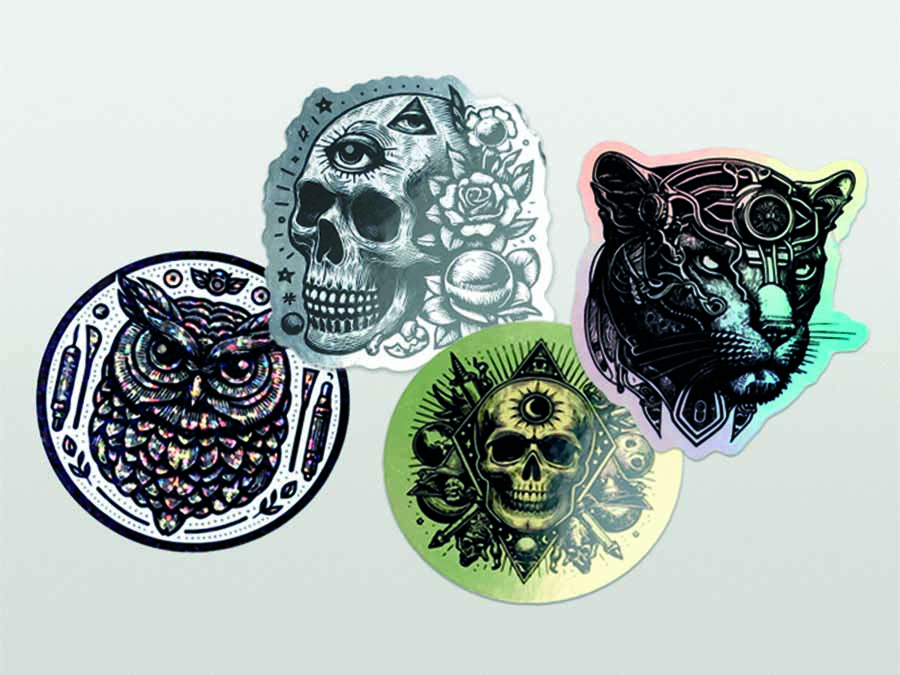
Metallic and foil Stickers
As explored in the Allure of Shiny Stickers, metallic finishes catch light, attract the eye and suggest craftsmanship. They lend an immediate sense of value, making them ideal for:
-
Premium packaging where visual distinction matters
-
Merchandise and giveaways that benefit from collectability
-
Limited editions or special events that justify a higher perceived value
A metallic surface can make a product or campaign feel established and intentional rather than routine.
Custom shapes
Laser-cut outlines add character and memorability. A Sticker that mirrors a logo or product silhouette reinforces brand identity and invites interaction — people are more likely to keep or share something that looks unique.
Perceived value and longevity
Premium Stickers often have a longer “life in the wild”. When used as promotional handouts or loyalty incentives, they tend to be displayed rather than discarded, providing ongoing exposure for little extra cost once produced.
The trade-offs to consider
Cost and turnaround time
Foils, metallics and bespoke cuts require extra setup and handling. This can increase both unit cost and lead time, especially on smaller runs.
Design limitations
Reflective surfaces can obscure detail. Fine lettering or thin lines may lose definition on metallic or holographic materials. Keep text bold and simple to maintain legibility.
Application and compatibility
Intricate shapes or thicker finishes may not feed smoothly through automated applicators. For machine application, test compatibility before committing to a large run.
Durability and suitability
Match finish to environment. Outdoor use may require UV-resistant lamination or stronger adhesive to prevent fading or peeling. Indoor use allows more flexibility.
Proportional use
Not every label benefits from a premium finish. For high-volume, functional applications — shipping, logistics or shelf labelling — standard materials remain the most cost-effective option.
Strategic use of premium finishes
For smaller businesses, a metallic or custom-cut Sticker can be a low-cost way to make a memorable impression. For larger brands, it’s a targeted tool for high-impact packaging or limited-run campaigns.
Use premium finishes strategically:
-
Reserve them for consumer-facing products, retail promotions or brand touchpoints that justify the upgrade
-
Run small tests before chain-wide roll-outs to check adhesion, durability and handling
-
Compare cost per impression rather than cost per unit when evaluating return on investment
When chosen for the right context, premium finishes add both visual and tactile value without compromising efficiency — turning functional Stickers into small but powerful brand statements.
10. How can Stickers add value in specific use-cases  and franchises?
Stickers are more than supporting materials — they’re practical tools that solve real operational and marketing challenges. Used thoughtfully, they can strengthen branding, improve flexibility and reduce cost across a range of business environments.
Product packaging for food and beverage brands
The challenge
Generic packaging can look uninspiring, while labelling must also withstand refrigeration or freezing. Brands often need a cost-effective way to print product variants or limited editions without investing in multiple packaging lines.
Sticker solution
Freezer-safe materials such as white gloss paper or polypropylene (PP) Stickers offer durability and flexibility for short runs or seasonal packaging.
The benefit
-
Consistent on-brand presentation
-
Fast turnaround for new SKUs or promotions
-
Reduced packaging costs through variable labelling
Pro tip
Use sheet formats for seasonal or limited editions applied manually on the packing line, and roll formats for ongoing machine application. Variable data such as batch codes or expiry dates can be overprinted onto the Sticker using inline printers.
Window and point-of-sale graphics for retail chains
The challenge
Retailers with multiple sites need coordinated signage that updates quickly and removes cleanly without damaging surfaces.
Sticker solution
Transparent vinyl Window Stickers and removable Wall Stickers provide a professional look that can be replaced or refreshed with ease.
The benefit
-
Consistent brand messaging across branches
-
Easy campaign updates without costly installation
-
Clean removal that protects surfaces
Pro tip
Supply branches with pre-cut sheets or rolls indexed by campaign. Include QR codes linking to branch-specific offers, and track uptake through serial numbering or short URLs printed on each Sticker.
Event and experiential marketing
The challenge
Pop-up events, launches and exhibitions demand strong visual identity but tight deadlines and temporary installations.
Sticker solution
Floor Stickers guide visitors and reinforce brand presence. Combined with wall graphics and handout Stickers, they create cohesive, immersive environments.
The benefit
-
Quick installation and easy removal
-
Reusable modular graphics for recurring events
-
Strong, immediate visual impact
Pro tip
Print event floor graphics with QR codes linking to microsites or competitions. Reuse the same design across locations for consistent branding and measurable engagement.
Trade and reseller opportunities
The challenge
Resellers and trade printers need to deliver Sticker solutions at scale without holding stock or investing in production infrastructure.
Sticker solution
Partnering with a white-label supplier that offers a broad range of Stickers and Labels — available in rolls, sheets and individual formats — allows you to fulfil client orders quickly while maintaining your own brand identity.
The benefit
-
Faster quoting and turnaround for your customers
-
No need for in-house production capacity
-
Access to premium materials and finishes through a trusted supplier
Pro tip
Develop a Sticker starter pack for your clients featuring sample formats (sheet, roll, custom shape). Include template artwork files and recommended use-cases for packaging, giveaways or short-run campaigns to speed up design and approval.
11. What are the common mistakes and how do you avoid them?
Even experienced marketers and print buyers can make errors that affect performance, budget or deadlines. These are the most frequent pitfalls when ordering Stickers and how to prevent them.
Summary and key take-aways
- Identify the format you need (sheet, roll, individual) based on application, volume and method of application.
- Choose material and adhesive appropriate for the surface, environment and brand context.
- Clarify the purpose of the Sticker early (packaging, promo, installation graphic) and design accordingly.
- Follow good-practice in artwork design (correct templates, bleed, border, shape, readability).
- For roll formats, pay attention to orientation, backing, core, die-cut/kiss-cut, spacing — crucial if machine application is involved.
- Size and shape decisions must match application context; custom shapes add value but may increase cost/complexity.
- Applications beyond traditional labels (floor, wall, window) can drive brand and operational value — but demand higher specification.
- Operational success depends on proper ordering process, lead time awareness, installation planning, stock/reorder strategy and measurement of ROI.
- Avoid common mistakes (wrong material, wrong format, bad lead time planning, over-finishing when not needed).
- Measure outcomes (cost per unit, application speed, engagement metrics, operational efficiency) to inform future runs.
- Stay aware of trends: eco-materials, smart print, large-format installation usage, automation, personalisation and custom finishes.


