
A printed Christmas Card is a thoughtful way to send seasonal best wishes to the people who matter to you, while expressing your creativity, humour or brand identity. Whether you’re designing your own card or commissioning professional artwork, taking a little care before you upload your file for Christmas Card printing helps ensure that they turn out just as you imagined.
While Solopress checks artwork before printing to ensure the final product is fit for purpose, it’s still worth understanding how to supply your file in a way that delivers the exact outcome you want. This is particularly important when you have a clear vision or specific layout in mind. This guide explains what to consider when preparing artwork for Christmas Cards, from choosing the right orientation to setting up folds and finishes.
1. Choose your dimensions
There are Christmas Cards can be printed in portrait, landscape or square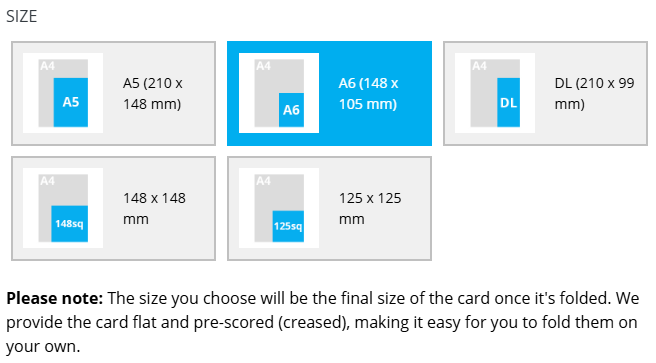
While it’s possible to create bespoke sizes, it’s important to bear in mind what envelopes you’ll use. For example, from Solopress you could order half-fold flyers in a wide range of sizes and in weights over 250gsm that could serve as greetings cards. However, no free envelopes would be provided, and you might face a challenge finding envelopes to fit rarely used dimensions.
2. Choose your orientation and fold direction
Christmas Cards can be printed in portrait, landscape or square, and can stand with the fold on the left (like a book) or at the top (like a calendar).

It wouldn’t be a Christmas Card without a front facing image, but other common features include an internal message, photographer or artist credit and back panel with a logo or text. It’s important to think carefully about how these will appear once the card is folded.

Crucially, the cover artwork needs to be oriented correctly in relation to the position of the fold.
Tip: To visualise your layout, print a rough mock-up on paper and fold it the same way you’d like your card to stand. This helps confirm that text and images appear the right way up.
3. Account for trimming and bleed
As with all printed products, Christmas Card artwork should include a 3mm bleed around every edge. This small margin allows for tiny movements during trimming and prevents unwanted white borders.
 For example, if you’re printing an A5 folded card (148 x 210 mm when closed), your artwork should be 154x 216 mm in total to account for 3mm bleed. You should also avoid fine detail or text within 3mm of the cutter guide in order to keep all the important content within the Safe Area. If you’re unsure how to set this up, our free downloadable templates will guide you.
4. Mind the fold
If your design features graphic elements, text or logos close to the fold, leave a few millimetres of clear space. Inked areas that cross the fold line can crack slightly when the card is creased, particularly on heavier stocks or laminated finishes.
If your design relies on precise alignment across the fold, such as a continuous image or border, our pre-flight team will do their best to ensure accuracy, but correct setup on your file is still the safest approach.
5. Prepare for special finishes

Christmas Cards often feature decorative finishes such as foil or Spot UV. These effects require a separate layer of artwork showing exactly where the finish should appear.
For example, if your card has gold foil on a logo or message, your artwork should include:
- The main CMYK design file
- An additional page or layer showing the foil areas in solid black
Full instructions can be found in our Foil Artwork Guide and Spot UV Artwork Guide.
6. Check your colours and resolution
Set your artwork colour mode to CMYK and use the FOGRA39 colour profile to ensure accurate results. Files in RGB may shift slightly when converted to CMYK for print.
Images should be at least 300dpi at full size. Lower resolutions may look fine on screen but can appear blurry or pixelated when printed.
You’ll find more detail in our Colour Guide and Resolution Guide.
7. File format and proofing
We recommend supplying your artwork as a print-ready PDF with fonts embedded and bleed included. Other accepted formats include EPS, TIFF or JPEG, but editable formats such as PDF, PSD or AI are best if you need adjustments later.
Once uploaded, our online proofing tool will show a preview so you can confirm everything is positioned correctly before approving for print.
If you’re ordering a folded card, check that the panels appear in the intended order and orientation on the proof.
8. Need professional help with your artwork?

If you’d rather not handle file setup yourself, our in-house creative team can prepare print-ready artwork for you through Solodesign.
Solodesign offers professional design at a reasonable price, whether you want a custom festive concept or simply need your supplied artwork adjusted for print. You’ll work directly with our designers, ensuring your message, logo and finishes are all presented perfectly.
If you’re designing your own layout, but using existing artwork or photography, it’s important that you have the proper permissions in place so as not to infringe copyright. The Greeting Card Association has some relevant advice on this topic.
9. Final checks before sending
Before you upload your Christmas Card artwork:
- Confirm your orientation and fold direction
- Ensure your artwork includes 3mm bleed
- Check text placement near the fold
- Convert colours to CMYK
- Review your proof carefully before approving
Our pre-flight checks are designed to catch and correct most common issues, but when you have a specific layout or finish in mind, it’s best to supply your artwork laid out and oriented exactly as you want it printed.
Ready to order?
Once your artwork is prepared, you can upload it directly when ordering Christmas Card Printing. If you’d prefer expert support, contact our Solodesign for professional artwork that captures the spirit of your message.


