
Learn how to make an isometric cube pattern easily, using Adobe Illustrator!
Video Tutorial
How To Make An Isometric Cube Pattern
Step By Step
Open Illustrator and start by drawing a hexagon on your art board. Using the line segment tool, draw lines from each corner of the hexagon. Straighten up the lines against each other to ensure that they are all accurate. Reduce the lines to the lengths show in the image below.

Double-check that the lines are accurately intersecting. Highlight the shape and click Divide in the Pathfinder Pallet.
Using the Rectangle Tool, draw three squares on the side of the project and use a different fill colour or variation of one colour one each swatch.
Select each side of the cube, using the pipet or eyedropper tool, choose the colours for each side from the swatches.
Delete your swatches, as you will no longer need them. Reduce the size of the cube and move it to the corner of your document.
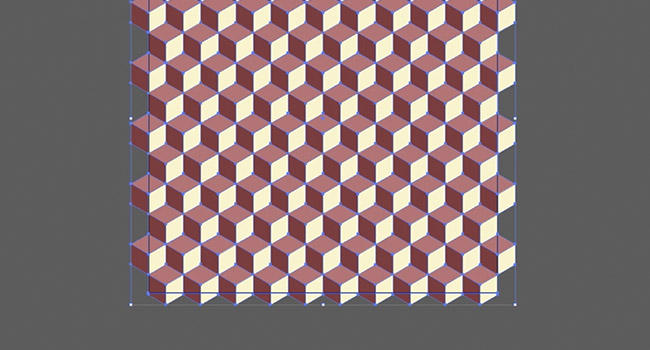
Copy and paste the cube and line up the copy with the existing cube. Duplicate this again until you have a line. Once you have it, you can now copy and paste the entire line and slot it above the existing ones.
Continue this process until the whole document is filled.
To finish off, draw a rectangle around the whole document the highlight the all of it and click Divide in the Pathfinder pallet.
Now you have an isometric cube pattern that Q*Bert would be proud of! Change up the colours to create different cool effects!
