

Learn how to design a Wedding Invitation in Adobe Photoshop with our expert, easy-to-follow video tutorial…
This video is part of our Adobe Creative series of design tutorials. Please make sure to subscribe to the Solopress YouTube channel so you don’t miss out on future guides!
How To Design A Wedding Invitation
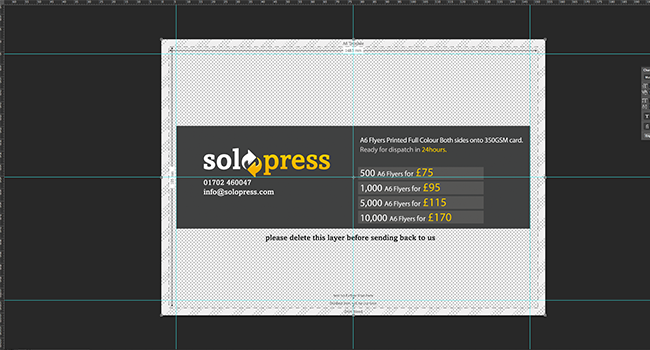
Download the FREE Solopress Invitation Template
Head to the Solopress website to download the free Photoshop A6 Flyers template guide as a base for your invitation.
Open the Photoshop file, we have created a guide layer that will help you design your wedding invitation – this includes the bleed area, trim and safe area.
Bleed Area – Anything here will be trimmed off, but remember to extend any colouring or images into this 3mm bleed area to avoid white lines appearing during the print finishing stages.
Trim – Your job will be cut on the solid black line, any images or text placed in this 3mm area may be trimmed off incorrectly.
Safe Area – Keep all your information insides the white area. Remember to use high-resolution images (300dpi) for the best results.
Create a new guide by clicking and dragging on the vertical and horizontal Ruler (if your Ruler does not appear in Photoshop press Command + R). Create 4 new guides on the safe area line.
In this video I have created 2 lines that run through the centre vertically and horizontally, you can set these to the exact measurement by clicking View – New Guide then entering 77.3mm for vertical and 55.5mm for horizontal.
Let’s get started on the Front design.
In the layers window, hide guide layer only refer to this layer to check your design fits within the safe area and make sure any colouring or images extends beyond the bleed area. In this video I have created a fill background using Layer – New Fill Layer – Solid Colour, but you can choose between solid colours, gradients, patterns and also images.
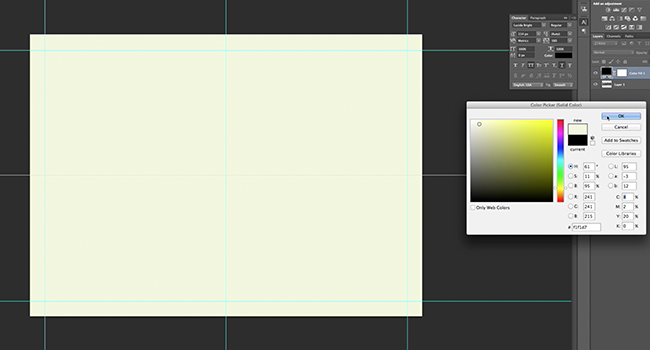
I found it best using a pastel colour for the background of a wedding invitation, if images are used I’d suggest they’re opacity is lowered against a light background to appear softer, this can be changed in the blending options if you right-click on the layer.
The best designs are the simplest, focus on basic themes and iconography of love and weddings. In this design, I have gone for a vintage look. Just changing a colour, font and image can have a huge effect on the final product, play around with different ideas, even match it to the theme or location of the wedding.
Once you have found or made images that you wish to use, you can drag them into the design from your Windows Explorer or Finder window. If sourcing images from the internet, I try to find images that have a transparent background in the PNG format, if you pick a JPEG you may have to spend a lot of time cutting around the image.
Once an image is imported to Photoshop, you will automatically be given the option to can its location, scale and rotation. If scaling an image, hold SHIFT so it doesn’t go out of proportion. Once you have the image in place hit Enter (or Return), this stops the ability to rotate and resize, but you can still move it.
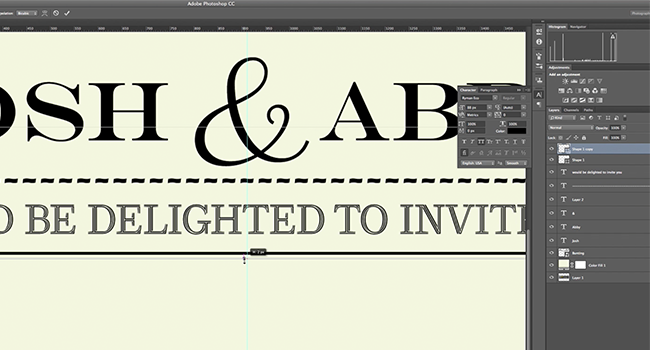
Use the text tool to enter text, you can change font and sizing in the top toolbar when text is selected. You can move your text with the Selection Tool.
You can further adjust text’s tracking, case and line spacing in the Character Panel.
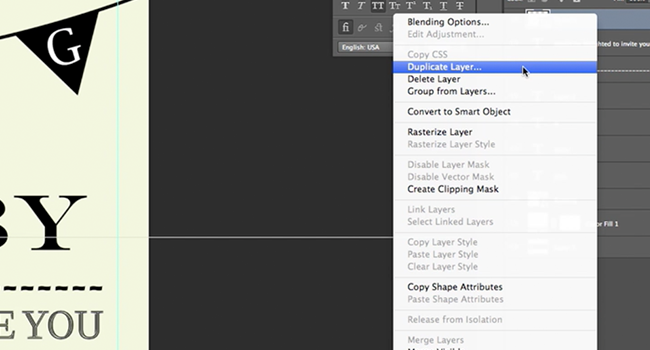
You can add shapes to the invitation, for example I have added lines for room to write names on the invitation. Rather than just a single line, I added a smaller line underneath to create more impact.
I copied the original line by using the Duplicate function. Right click on the layer you wish to copy and select Duplicate.
Once finished save it under a different name, then open the template again to get ready to do the back.
Let’s get started on the Back design.
Create your guides again on the back exactly the same as the front.
It’s up to choice but I wanted to keep the same colours and style on the back of the invitation to create continuity. To make sure I got the exact colour I duplicated it into the new file.
To do so right click the layer in the front invitation’s window and click Duplicate, this time change the destination to the new project file.
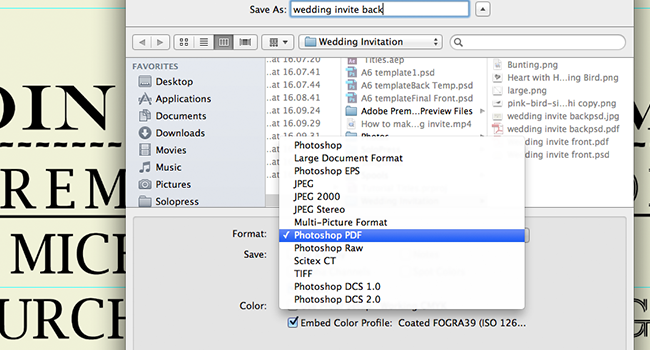
When you are finished, remember to delete the template layer on both the front and back. Save the files as a Photoshop PDF. For printing follow the instructions at solopress.com.

That’s it, simple! What’s better than adding that personal touch to your special day.
If you have any comments or questions regarding designing a wedding invitation, please use the comments section below and we’ll do our very best to answer your queries.
For more expert video guides to professional creative applications, visit the Solopress Youtube channel or stay tuned to the Solopress Blog.
Thanks for watching our video tutorial.
