

Back in the day, the double exposure effect was produced using nothing but a camera to combine two separate images, creating an amazing abstract photograph. Recently, double exposure images have become popular again, and there are many people creating surreal images, but now it’s usually done with software like Photoshop.
Typically, a portrait and a landscape are blended together, so this is what our tutorial will show you today.
Step 1: Select your images
Choose images that work well for this tutorial. Portraits with dark tones such as brown hair on a light background work very well, as they help to bring out the details in the landscape.
Step 2: Open the base images
Open both original images and place the cityscape on top of the portrait. Change the Blending Mode of the city to Screen. Here, think about the composition of your image, as the placement of the cityscape can have a dramatic effect on the final, finished image.
I have desaturated both images, so we can add custom colours later. To do this, go to Image > Adjustments > Desaturate (Shift + CMD + U)
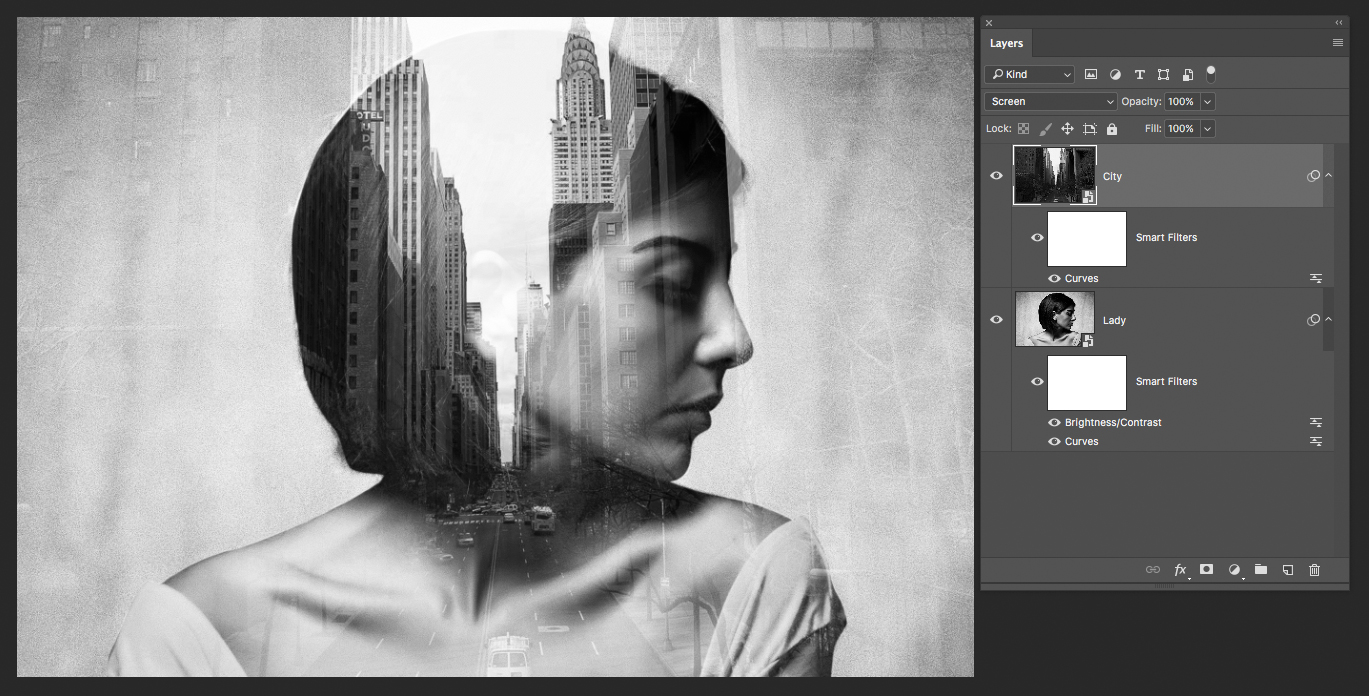
Step 3: Correct Contrast
As you can see in the image above, I have added a Smart Filter (to do this, simply right click on the image in the layer panel and select Convert to Smart Object) to each layer. I am using this smart filter to adjust the Curves to get a deeper black in the shadows of the face and hair. By doing this, it helps bring out the cityscape’s lighter tones.
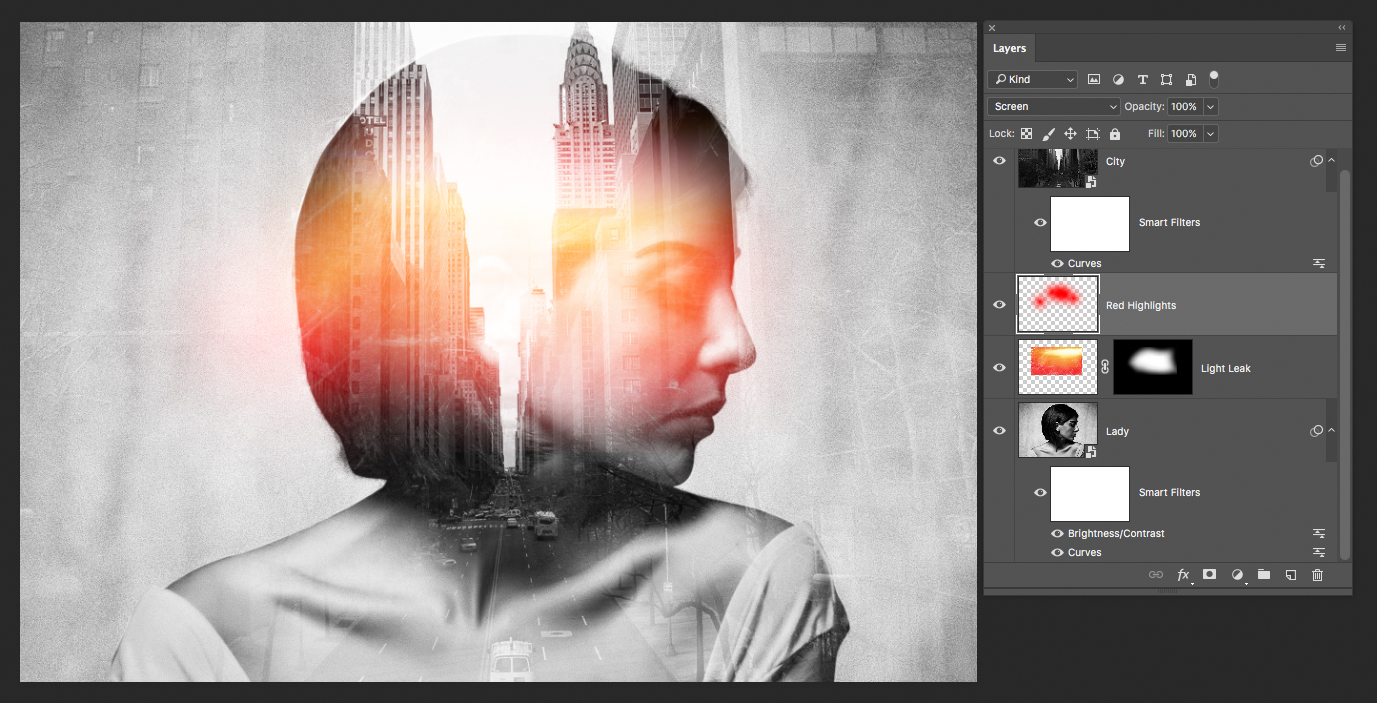
Step 4: Add light leak
Now it’s time to add some dramatic lighting. For this, I have used a light leak found on Google Images. Drop your desired light leak into Photoshop, set the Blending Mode to Screen and create a Layer Mask. Then, using a soft brush with the foreground colour set to black, soften the edges of the light leak image.
In the image below, I created a new layer and added some extra red highlights.
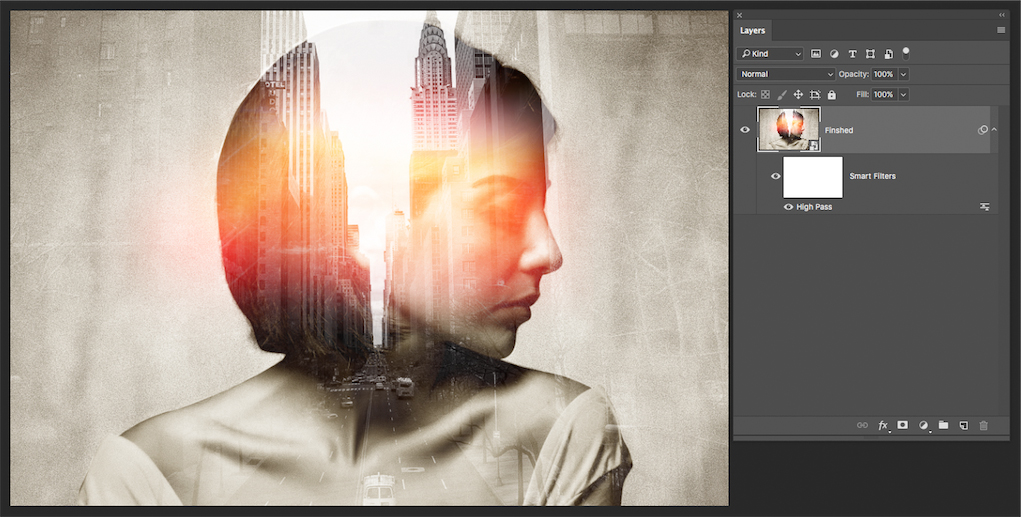
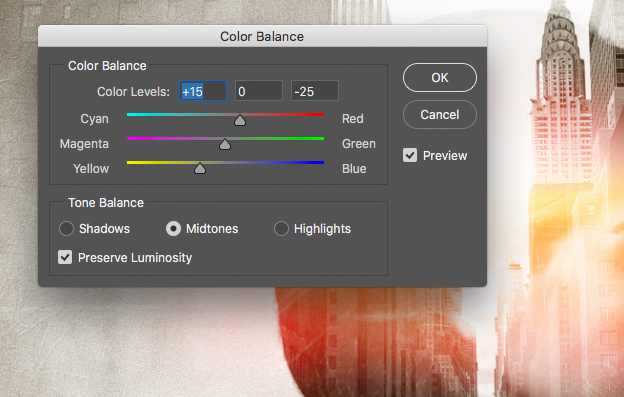
Step 5: Flatten image and adjust colour
Now is a good time to have a play with the Curves and Colour Balance of the image. I have opted for yellow highlights and deep blue shadows.
Congratulations! You’ve just created an image with Double Exposure effect.
Now that you’ve finished your new design, why not have it printed on some professional flyers or glossy poster printing?
